Sunday, June 2, 2013

Ciasto czekoladowe z kremówką i trukawkami / Chocolate Cloud Cake with strawberries

For the recipe in English please scroll down


Bardzo czekoladowe, ciężkie ciasto, idealne na Dzień Dziecka :)
Oryginalnie z przepisu Nigelli, ale wczesnym latem nie sposób się oprzeć i nie dodać kilku świeżych, soczystych, słodkich truskawek.


Ciasto:

250 gram ciemnej czekolady (minimum 70% kakao)
125 gram masła
6 dużych jaj (2 całe, 4 oddzielone)
175 gram cukru w proszku
2 łyżki syropu Cointreau (opcjonalnie)
starta skórka z jednej pomarańczy (opcjonalnie)

Krem:

500ml śmietany kremówki
3 łyżki cukru pudru
1 łyżka ekstraktu z wanilii
2 łyżki syropu Cointreau (opcjonalnie)
1/2 łyżki kakao lub startej czekolady (do posypania)

Truskawki do przybrania

Przygotowanie:
Piekarnik nagrzać do 180 stopni. Okrągłą foremkę o średnicy 23cm wyłożyć papierem do pieczenia.
Czekoladę roztopić w mikrofalówce lub w kąpieli wodnej, następnie dodać masło i poczekać aż się rozpuści. Wymieszać.


Ubić dwa całe jajka oraz cztery żółtka oraz 75 gram cukru pudru, stopniowo dodawać mieszankę czekoladową, syrop oraz skórkę pomarańczową.
W osobnej misce ubić cztery białka a następnie dodać 100 gram cukru i ubijać aż masa bedzie gęsta.
Masę czekoladową wymieszać z masą białkową. Przelać do foremki. Piec przez 35-40 minut lub do momentu aż ciasto będzie wyrośnięte i popękane.
Przenieść na kratkę do ostygnięcia. Ciasto podczas ostygania opadnie.

Zimną kremówkę ubić z cukrem, nie przestając ubijać dodać ekstrakt z wanilii oraz syrop.


Wierzch ciasta przykryć kremem. Ułożyć truskawki i posypać kakao lub startą czekoladą.


***

So this time I prepared this cake, inspired by Nigella's Chocolate Cloud, for all the kids on their special day adding up some fresh strawberries.
It always comes out perfect and very tasty. Everyone loves it and it's also very easy to make. It is unbelievable for all true chocolate lovers...very decedent!!
So rich and moist.


Ingredients


    250 grams dark chocolate (minimum 70% cocoa solids)
    125 grams unsalted butter (softened)
    6 large eggs (2 whole, 4 separated)
    175 grams caster sugar
    2 tablespoons Cointreau (optional)
    grated zest of 1 orange (optional)

For the cream topping

    500 ml double cream
    1 teaspoon vanilla extract
    1 tablespoon Cointreau (optional)
    ½ teaspoon unsweetened cocoa or chocolate powder (for sprinkling)

    Fresh strawberries, for decoration.

Method

    Preheat the oven to 180°C/gas mark 4.Line the bottom of a 23cm springform cake tin with baking parchment. Melt the chocolate either in a double boiler or a microwave, and then let the butter melt in the warm chocolate.Beat the 2 whole eggs and 4 egg yolks with 75g of the caster sugar, then gently add the chocolate mixture, the Cointreau and orange zest.
    In another bowl, whisk the 4 egg whites until foamy, then gradually add the 100g of sugar and whisk until the whites are holding their shape but not too stiff.
    Lighten the chocolate mixture with a dollop of egg whites, and then fold in the rest of the whites. Pour into the prepared tin and bake for 35-40 minutes or until the cake is risen and cracked and the centre is no longer wobbly. Cool the cake in its tin on a wire rack; the middle will sink as it cools.
    When you are ready to eat, place the still tin-bound cake on a cake stand or plate for serving and carefully remove the cake from its tin. Don't worry about cracks or rough edges: it's the crater look we're going for here. Whip the cream until it's soft and then add the vanilla and Cointreau and continue whisking until the cream is firm but not stiff.
    Fill the crater of the cake with the whipped cream, easing it out gently towards the edges of the cake, decorate with strawberries and dust the top lightly with cocoa powder pushed through a tea-strainer.

Wednesday, May 29, 2013

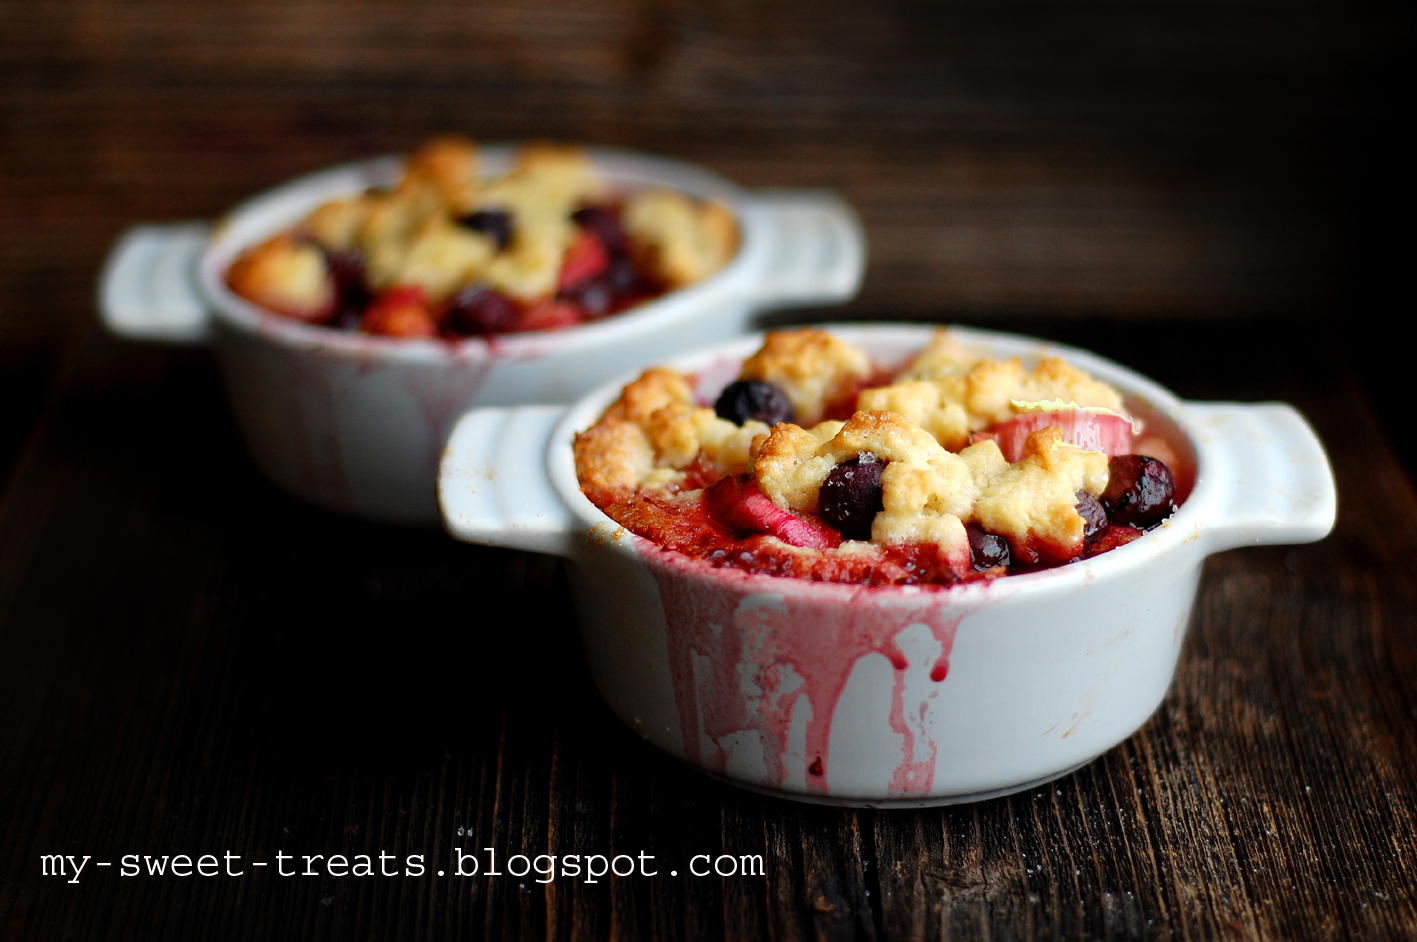
Tarta z rabarbarem i borówkami. / Rhubarb blueberry tart

For the recipe in English please scroll down
 
Poza zapachem bzu i kwitnącym kasztanem nie ma chyba przyjemniejszej oznaki wiosny niż rabarbar. Zawsze przegapiałam okazję na upieczenie z nim ciasta, ale postanowiłam, że tej wiosny muszę z nim poeksperymentować.
Kiedy byłam mała, moja mama przygotowywała drożdzowe ciasto rabarbarowe i dała mi kilka wskazówek, ale postanowiłam, że zacznę od klasycznej tarty. 
Tarta ma świetny smak-nie za słodki - no i rzeczywiście czuć wiosnę :) Idealne do kawy na balkonie :)


Tarta:  
1 1/4 szklanki mąki  
1 szklanka cukru  
1/4 łyżeczki soli  
8 łyżek (115 gram) masła, wyjętego z lodówki, posiekanego  
1 duże jajko
2 łyżki wody

Nadzienie:
1/2 szklanki pokrojonego w plasterki rabarbaru
1/2 szklanki borówek
1/2 szklanki cukru
 
W dużej misce mieszamy mąkę, sól i cukier. Dodajemy masło i siekamy, aż ciasto zacznie przypominać gruboziarnisty piasek. Dodajemy jajko i wyrabiamy ciasto do gładkości. Odkładamy do lodówki na ok. 30 minut. Po wyjęciu ok pół szklanki ciasta odkładamy na później.
Następnie wykładamy ciasto do foremek i ugniatamy tak, aby zachowało równą grubość, a przy brzegach było wyższe. Kilkakrotnie nakłuwamy widelcem (aby równomiernie się upiekło). Wkładamy do piekarnika na 15 minut lub do czasu aż ciasto będzie jasnozłote.
Borówki i rabarbar mieszamy z cukrem. Następnie wykładamy na ciasto, przykrywamy rozdrobnionym ciastem i pieczemy jeszcze przez 10 minut.


***
 I make this tart several times a year and love it, as do my guests. Previously I have made many tarts (most of them lemon) and each time I tried a new recipe but nothing beats my old favorite. Perfect proportions of crust to filling and a great tart flavor. This time I decided to use rhubarb and blueberries and it was a total hit! All my guessed agreed that it was absolutely fabulous. As I said, I've been making the lemon tart quite often, but it's got big competition now!

 Rhubarb Blueberry Tart

 Tart Crust
1 1/4 cups (155 grams) all-purpose flour
1/4 teaspoon salt
2 tablespoons granulated sugar
8 tablespoons (115 grams) cold butter, cubed
1 large egg
2 tablespoons ice water


1/2 cup of rhubarb stalks
1/2 cup of  blueberries
1/2 cup of sugar

In a large mixing bowl, mix together the flour, salt, and sugar. Cut in the cubed butter with a pastry blender or with your hands until the dough resembles coarse sand. Mix in the egg and water until dough comes together. Reserve the leftover dough for the top Press dough into a tart pan, taking care to keep the dough an even thickness. Stab the bottom several times with a fork so the dough will bake evenly in the oven. Refrigerate dough for 30 minutes to firm up.
Preheat oven to 350 degrees F (180 degrees C).
Bake the tart shell for 15 minutes, or until it is lightly colored and the shell feels dry to the touch.
Combine rhubarb and blueberries in a bowl. Stir together brown sugar, Spoon the filling into the pie crusts.Top with pastry.
Bake for another 10 minutes in the center of the oven. When the topping is browned and the fruit is bubbling, it is done. Serve warm with your favorite topping but vanilla ice cream is traditional.


Tuesday, May 28, 2013

Warstwowy tort czekoladowy z truskawkami / chocolate layered cake

For the recipe in English please scroll down 


Na ciasto:
  • 250 ml mleka
  • 125 g czekolady
  • 125 g masła lub margaryny
  • 250g cukru pudru
  • 2 jajka
  • 300g mąki
  • 1 łyżeczka proszku do pieczenia
  • 1 łyżeczka sody
  • 2 łyżki kakao

Czekoladę roztopić w misce nad rondlem z gorącą wodą. Miękkie masło i cukier ubić mikserem na puszysta masę, nie przestając ubijać dodawać po jednym jajku. Przesiać suche składniki do ciasta i mieszać, aż ciasto będzie dokładnie wymieszane i połączone. Nie przestając ubijać dodać połowę mleka, roztopioną czekoladę i pozostałą część mleka.

Ciasto podzielić pomiędzy 4 małe foremki z ciastem, (ja miałam tylko dwie, więc piekłam ciasto w dwóch turach, upewniając się, że ciasto podzielone jest na równe kawałki. Można też upiec ciasto w dwóch wyższych foremkach, a następnie przeciąć wzdłuż na dwa równe placki- jednak należy wtedy odpowiednio wydłużyć czas pieczenia.

Małe placki piec około 15 minut w temperaturze 180 stopni. Odstawić do ostygnięcia na kratce.


Na ciasto i dekorację
  • 300g truskawek
  • 500ml śmietany kremówki
  • 50g cukru pudru

8 truskawek przekroić na połówki i odstawić na bok do dekoracji. Posiekać resztę. Kremówkę ubić aż będzie sztywna, dodać cukier oraz pozostałą część truskawek.
Zamiast siekania można też użyć wszystkich truskawek do dekoracji, a ciasto przełożyć tylko kremówką. Na paterze ułożyć ciasto, następnie kremówkę, truskawki, ponownie ciasto, kremówkę, truskawki, i przy wszystkich warstwach. Wierzch tortu posmarować pozostałą kremówką i ozdobić truskawkami.

***

For the sponge
  • 250ml buttermilk
  • 125g plain chocolate
  • 125g butter or margarine
  • 250g caster sugar
  • 2 eggs
  • 300g self raising flour
  • 1 tsp bicarbonate of soda
  • 2 tbsp cocoa powder
Melt the chocolate in a bowl over a saucepan of hot water. Cream together the butter and sugar then beat in the eggs one at a time. Sieve the dry ingredients into the cake and fold until well combined. Beat in half of the buttermilk, then the melted chocolate and remaining buttermilk.
Divide the mixture between three 7 tins (I only have two so I baked then in two goes, and weighed the mixture to make sure each tin had the same amount). Bake at 180 degrees on the middle shelf of the oven, for approximately 15 minutes. Leave to cool on a wire rack.
For the filling and decoration
  • 300g strawberries
  • 500ml double cream
  • 50g icing sugar
Halve all the strawberries for the decoration and set aside.
Divide the cream mix into 4 portions. Spread cream onto the cake layer, decorate with strawberries, cover with another cake layer, then cream, strawberries and so on.

Tuesday, April 30, 2013

Pistacjowo-czekoladowe fudge /Chocolate Pistachio Fudge

For the recipe in English please scroll down

Bardzo długo zastanawiałam się nad przyrządzeniem tego deseru, chociaż znalazłam go już dawno w jednej z ksiażek Nigelli. Z jednej strony obawiałam się czy nie będzie przesadnie słodki, z drugiej jednak jestem uwielbiam wszystko, co jest przyrządzone na bazie pistacji.

W weekend okazało się, że mam jeszcze kilka garści pistacji z ciasta, które upiekłam w tygodniu wiec stwierdziłam, że czas w końcu zabrać się za ten deser :)

Jest bardzo szybki w wykonaniu i rzeczywiście, bardzo słodki. Chociaż słonawy posmak pistacji świetnie z ta słodka czekoladą współgra.
Świetna propozycja dla wszystkich fanów pistacji!


Składniki:


 350 gram ciemnej czekolady
400 gram mleka skondensowanego (mniej niż duża puszka)
30 gr masła
szczypta soli
150 gram pistacji


Posiekaną czekoladę, mleko, masło oraz sól umieścić w rondlu na małym ogniu i dokładnie mieszać aż do rozpuszczenia i połączenia składników. Z doświadczenia wiem, że bardzo istotne jest, żeby ogień był naprawdę bardzo mały i żeby bardzo dokładnie mieszać te dwa składniki - łatwo ulegają przypaleniu.

Po zdjęciu z ognia dodać pistacje. Można je wcześniej umieścić w woreczku i rozbić na kawałki (jak w przepisie oryginalnym), ale ja osobiście wole pistacje w całości. Dokładnie wymieszać.


***

I first saw this recipe in one of Nigella’s book and I knew that I had to make this immediately, I was just afraid that in may be too sweet, but as I am someone recently obsessed with all things pistachio, having some left from the previous dessert I baked, finally I decided to try it! It is super delicious, easy and quick to make, and it looks so festive with the green pistachios. I have also made it with coconut and then cranberry, and both were equally delicious, and I suppose you could make this fudge with just about any of your favorite filling!


350 grams dark chocolate (chopped, minimum 70% cocoa solids)
1 x 397 grams can condensed milk
30 grams butter
pinch of salt
150 grams pistachio nuts 


Put the chopped chocolate, condensed milk, butter and salt in a heavy-based pan on a low heat, and stir to melt. Put the nuts into a freezer bag and bash them with a rolling pin, until broken up into both big and little pieces. Add the nuts to the melted chocolate and condensed milk and stir well to mix. Pour and spatch this mixture into a foil tray 23cm square, smoothing the top. Once cut, it can be kept in the freezer - no need to thaw just eat straight away.


Thursday, April 25, 2013

Delikatny tort bezowy z masą karmelową i suszonymi figami / Layered Pavlova with carmel cream and figs

For the recipe in English please scroll down
Beza z karmelem i figami kusiła mnie już dawno. Długo czekałam na okazję, aż w końcu postanowiłam przygotować to ciasto z okazji Dnia Mamy :) Podczas przygotowania ciasta, dyskutowałam z przyjaciółką (której bezy wychodzą zawsze abolutnie-obłę-dne), że prawdopodobną tajemnicą ciasta jest jego bardzo długie ubijanie białek. Nawet przez 15-20 minut.
Masa karmelowa z figami smakowała absolutnie wszystkim.
Ciasto, które polecam wszystkim bez wyjątku! :)


Ciasto:

6 białek
1 1/3 szklanki cukru pudru
1 łyżeczka octu ryżowego

Masa karmelowa:
opakowanie serka mascarpone
250 ml śmietany kremówki
opakowanie masy krówkowej 
garść fig suszonych


Piekarnik (bez funkcji termoobiegu) nagrzać do 140 stopni. Na dwóch arkuszach papieru do pieczenia narysować okrąg szerokości 24 centymetrów. Posypać cienką warstwą mąki kukurydzianej.
Przy pomocy miksera ubijać białka aż masa będzie sztywna. Nie przestając ubijać dodawać po łyżeczce cukier. Masa powinna być gładka i błyszcząca. Po dodaniu ostatniej łyżeczki cukru dalej ubijać, jeszcze około 8 minut. (Nie zdarzyło mi się jeszcze, żeby masa białkowa opadła i wydaje mi się, że takie długie ubijanie to może być sekret udanego ciasta bezowego).
Ciasto przełożyć na przygotowane arkusze papieru do pieczenia. Uformować placki na kształt narysowanych wcześniej okręgów, odrobinę więcej ciasta nałożyć przy brzegach, mniej na środku. Piec około 75-90 minut, aż ciasto będzie suche, lekko złotawe i chrupiące. Wyłączyć piekarnik i otworzyć drzwiczki piekarnika (ciasto może opaść podczas studzenia)

 Masa:

Figi zalać gorącą wodą, odcedzić i pokroić. Schłodzoną śmietanę ubijać aż masa będzie sztywna. Dodawać po łyżce serek mascarpone. Gdy masa będzie gładka, nie przestając mikować dodawać stopniowo masę krówkową. Następwnie dodać figi i wymieszać.

Masą przełożyć ciasta bezowe. Posypać tartą czekoladą.


***

This is my never fail-go to recipe for an impressive dessert. Every time I make it, I get fabulous reviews. Texture is beautifully marshmallowy in the middle with a lightly crisp crust. This time I made it for my mum for Mother's Day. 


6 eggwhites
1 1/3 cups caster sugar
1 teaspoon white vinegar
1 teaspoon cornflour
mascarpne cheese

Preheat oven to 200°C. Draw two 24cm (diameter) circles on two sheets of baking paper. Place, pencil-side down, on a baking tray. Dust lightly with 1 teaspoon cornflour.
Using an electric mixer, beat eggwhites and cream of tartar in a large bowl until soft peaks form. Add sugar, 1 tablespoon at a time, beating constantly until thick and glossy.
Spoon meringue onto baking paper. Shape into a circle, using the pencil mark as a guide, with a slightly higher edge and a low centre. Reduce oven to 100°C. Bake for 1 1/4 to 1 1/2 hours or until dry and crisp. Turn off oven and open oven door. Cool completely in oven (pavlova may sink during cooling)


1 cup heavy cream
8 ounces mascarpone cheese, room temperature
1 spoon confectioners' sugar, sifted
1/2 cup dulce de lece
1/2 cup of dried figs

With an electric mixer on medium speed, whisk heavy cream until stiff peaks form (be careful not to overbeat, or cream will be grainy). In another bowl, whisk together mascarpone, dulce de lece and confectioners' sugar until smooth. Gently fold whipped cream into mascarpone mixture until completely incorporated. Add chopped figs. 
Place one disc of meringue onto a serving plate. Spread with half of the cream, and top with another disc of meringue and half the remaining cream. Decorate with chocolate curls

Thursday, April 18, 2013

Babeczki z Maltesersami / Maltesers Cupcakes

For the recipe in English please scroll down

Nie ma chyba większego fana i adwokata Maltesersów niż ja. Naprawdę. Ze względu na to, że tak trudno je dostać, jest to zawsze prezent od moich zagranicznych przyjaciół na wszystkie możliwe okazję. Na Gwiazdkę, urodziny, na walentynki… 
Raz nawet dostałam je na randce zamiast kwiatów, bo, jak stwierdził mój przyjaciel, bardziej mnie ucieszą. Miał rację :)
W przepisie zredukowałam do minimum ilość cukru, zarówno w babeczce jak i w kremie. A tym samym babeczki w połączeniu ze słodkimi cukierkami nie są mdląco słodkie. Większością moich wypieków częstuję kolegów i koleżanki z pracy. Trochę już tych babeczek przyniosłam, ale wszyscy zgodnie stwierdzili, że te są absolutnie najsmaczniejsze ze wszystkich dotychczasowych :) Po kilku minutach od wejścia do biura po babeczkach pozostała już tylko legenda.

Aha, nie zapominajmy, że Maltesersy są z założenia lżejszą wersją czekolady, a co za tym idzie są to babeczki, które możemy jeść bez absolutnie żadnych wyrzutów sumienia. No czego możemy chcieć więcej na wiosnę? :)


Składniki:  
Na babeczki: 
110 gram miękkiego masła
110 gram cukru
2 duże jajka
110 gram mąki 2 łyżeczki proszku do pieczenia
1 łyżeczka ekstraktu z wanilii kilka łyżek mleka

 kilka Maltersersów


Na krem:
1 1/2  kubka śmietany kremówki
3 łyżki cukru pudru
1 łyżeczka ekstraktu z wanilii
200 g  Maltesersów

Babeczki:

Formę na muffinki wyłożyć 12 papilotkami. Piekarnik nagrzać do 180 stopni.
Wszystkie składniki powinny być w temperaturze pokojowej.

Mąkę, proszek - przesiać, odłożyć na później.

W misie miksera utrzeć masło i cukier na puszystą i jasną masę. Wbijać jajka, jedno po drugim, dokładnie miksując. Nie przestając ubijać do masy dodać mąkę wymieszaną z proszkiem do pieczenia, a następnie ekstrakt waniliowy. Jeżeli masa jest bardzo gęsta, można dodać kilka łyżek mleka.

Ciasto rozdzielić pomiędzy papilotki, wyrównać. W foremce można "schować" pod ciastem Maltesersa.
Piec przez około 20 - 25 minut, do tzw. suchego patyczka. Wyjąć, wystudzić na kratce.


W dużej misce ubijać mikserem na średniej prędkości śmietanę kremówkę aż będzie gęsta. Dodać cukier oraz aromat i ubijać, uważając, żeby masa się nie zważyła.


Babeczki dekorować kremem przy pomocy dużej końcówki tylki. Udekorować Maltesersami.


***


So here is the thing. I suppose there you will not meet grater advocate of Maltesers than myself. Well, obviously they are delicious, as anyone will tell you, but the problem is that you can’t get them where I live.. So my friends send me them over for all the possible occasions, like birthdays, namedays, Christmas, even Valentine’s day.
In my recipe I reduced the amount of sugar both in the cupcake and in the frosting, and everyone said this was a great idea as cupcakes with lots of Maltesers on them weren’t too sweet. Also, you can add cocoa powder if you would like to make the cupcakes more chocolate – this time I decided to skip this and used no cacoa powder.
I always share my cupcakes with colleagues and so far I baked a lot, but as they said, they were by far the nicest cakes I’ve made yet and they were gone within five minutes of coming into the office!

Ohh, and also, last but not least, as they are 'the lighter way to enjoy chocolate', that makes my cupcakes completely guilt-free! A perfect idea for Spring, isn’t it?! :)


For the cupcakes
4oz butter, softened
4oz caster sugar
2 large eggs
4oz self-raising flour
1tsp baking powder
1tsp vanilla Extract


For the Whipped Cream Frosting:
1 1/2 cups heavy cream 
3 tablespoons confectioners' sugar 
1/4 teaspoon vanilla extract 
200 g Maltesers

Preheat the oven to 180 degrees and fill a twelve-hole muffin tin with a dozen large muffin cases. Cream butter and sugar together so that it becomes pale and fluffy, beat in the eggs one at a time so that they are incorporated. Sift the flour and baking powder together and add this a third at a time to the batter, follow this with the vanilla extract.


Divide batter evenly among liners, filling each about three-quarters full. Bake until tops spring back when touched, about 20 minutes, rotating pan once if needed. Transfer to a wire rack; let cool for 5 minutes. Remove cupcakes from pan, and let cool completely on wire rack.


In a large, chilled bowl with an electric mixer on medium-high speed, beat cream until it begins to thicken. Add sugar and vanilla extract and beat until soft peaks form.
Fit a piping bag with a 1cm star nozzle and pipe the cream on top of the cupcakes. Decorate with Maltesers.


***

Friday, April 12, 2013

Babeczki Red Velvet / Red Velvet Cupcakes

For the recipe in English please croll down


O babeczkach Red Velvet pierwszy raz usłyszałam od koleżanki, która powiedziała mi, że jest to najbardziej trendy ciastko w Nowym Jorku. No skoro tak jest, to przecież nie mogłam go u mnie zabraknąć!
Dość długo podchodziłam do przepisów sceptycznie, aż w końcu zdecydowałam się spróbować.
Chciałabym od razu zdementować plotkę - kolor ciasta nie ma nic wspólnego z owocami.. Za to świetnie komponuje się z białym kremem, a do tego zapakowanie babeczek do słoiczka, to super pomysł na prezent!


NA 12 SZTUK
Czubata szklanka mąki
Łyżeczka proszku do pieczenia
2 łyżeczki niesłodzonego kakao
Kostka masła, w temperaturze pokojowej, lub miekkiej margaryny
3/4 szklanki cukru
2 jajka, lekko rozmieszane
1/2 szklanki mleka
1 łyżka ekstraktu z wanilii
1 łyżka barwnika spożywczwego w kolorze czerwonym

Krem
200 g serka typu “Twój Smak”, “Philadelphia”
200 g masła w temperaturze pokojowej
2 ¼ szklanki cukru pudru

Piekarnik nagrzać do 180 C. Blaszkę muffinkową wyłożyć papilotkami.
Mąkę, proszek do pieczenia oraz kakao przesiać razem do jednej miski. Masło i cukier przełożyć do osobnej miski i ubijać aż masa będzie jasna i puszysta. Nie przestając ubijać, stopniowo dodawać jajka, i połowę mąki. Dalej ubijając dodać mleko, ekstrakt z wanilii oraz barwnik, a na samym końcu, dalej ubijając pozostałą część mąki.
Masę przełożyć do muffinek. Piec w nagrzanym piekarniku ok 15-20 minut, lub, aż babeczki wyrosną i będą sprężyste w dotyku. 
Babeczkę wyjąć z papilotki, ostrożnie włożyć do słoika, przełożyć bitą śmietaną, położyć kolejną babeczkę i ponownie udekorować kremem. 


***


Red Velvet Cupcakes are one of those delicious treats that I’m pretty sure no one can resist.
And these look really fabulous layered  in a jar like that!


***

Babeczki cytrynowe / Lemon Cupcakes

For the recipe in English please scroll down


Babeczek cytrynowych nie trzeba chyba nikomu przedstawiać. Ze względu na lekko kwaskowy smak na pewno nie wszystkim 

przypadną do gustu, natomiast z pewnością  są świetną propozycja dla osób, które poszukują babeczek niekoniecznie bardzo, 
bardzo słodkich. Poza tym cytryna to samo zdrowie, prawda? Można więc przymknąć oko na te kilka kalorii :)


 Babeczki

1 1/4 szklanki maki

1 łyżeczka proszku do pieczenia
1/8 łyżeczki soli
1/2 kostki masła, w temperaturze pokojowej
1 szklanka cukru
2 duże jajka
1 łyżka soku z cytryny
2 łyżki startej skórki cytryny
1 łyżka ekstraktu waniliowego
1/2 szklanki mleka


Krem

1/2 kostki masła w temperaturze pokojowej
115 g serka typu “Twój smak” w temperaturze pokojowej
2 łyżki drobno startej skórki cytrynowej
1 łyżka ekstraktu z wanilii
2 szklanki cukru pudru

Glazurowana skórka cytrynowa (opcjonalnie)

1 duża cytryna, umyta
1/3 szklanki wody
1/4 szklanki cukru
1 łyżeczka vinegar  


Piekarnik nagrzać do 180 stopni. Blaszkę do muffinek wyłożyć papierowymi papilotkami.
Mąkę, proszek do pieczenia i sól przesiać do średniej wielkości miski i odstawić.


W dużej misce, używając miksera, mieszać (średnia prędkość) masło i cukier aż masa będzie gładka i jasna (około 2 minut). Nie przestając 
ubijać dodawać po jednym jajku, ubijać tak długo, aż masa będzie miała konsystencje kremu, będzie gładka i jasna.

Dodać sok z cytryny, starta skórkę cytrynowa i ekstrakt waniliowy i ubijać do wymieszania składników.


Zmniejszyć prędkość ubijania i dodawać, w trzech częściach, na przemian make i mleko, zaczynając i kończąc na mace. Miksować aż składniki będą 
całkowicie połączone a masa gładka.

Ciasto nakładać łyżką do papierowych papilotek.

Piec ok 20 minut do momentu aż babeczki sie zarumienia, lub do "próby patyczka”.
Przełożyć babeczki na kratkę i studzić około 10 minut.

Krem:

W dużej misce, przy użyciu miksera na niskiej prędkości ubić masło i serek. Dodać skórkę pomarańczową i ekstrakt waniliowy i miksować do połączenia składników (około minuty). Dodać cukier puder i miksować aż masa będzie gładka.

Przy pomocy małej szpatułki nakładać masę na babeczkę (około 3 łyżek masy na babeczkę).

Glazurowana skórka cytrynowa

Skórkę cytrynową zetrzeć na tarce, wrzucić do rondelka, zalać wodą i zagotować, następnie odcedzić i zalać zimną wodą. Zagotować, dodać cukier i vinegair i gotować na wolnym ogniu, mieszając aż do rozpuszczenia cukru. Gotować około 10 minut. Do wyjęcia cytryny z rondelka najlepiej użyć łyżeczki z rozcięciem na końcu lub widelca. Ostudzić i udekorować krem na babeczkach.


***
 Lemon cupcakes do not need any additional introduction. Due to the slightly sour taste they may not please everyone's tate, but this is a certainly a great option for people who are looking for cupcakes not necessarily too sweet. 

Cupcakes

Makes 12
1 + 1/4 cups cake flour
1 teaspoon baking powder
1/8 teaspoon salt
1/2 cup (1 stick) unsalted butter, at room temperature
1 cup sugar
2 large eggs
1 tablespoon lemon juice
2 teaspoons grated lemon zest
1 teaspoon vanilla extract
1/2 cup whole milk

Frosting
1/2 cup (1 stick) unsalted butter, at room temperature
4 ounces cream cheese, at room temperature
2 teaspoons finely grated lemon peel
1 teaspoon vanilla extract
2 cups powdered sugar

Glazed lemon peel
(optional)
1 large lemon, washed
1/3 cup water
1/4 cup sugar
1 tablespoon cider vinegar

Position a rack in the middle of the oven. Preheat the oven to 350 F. Line 12 muffin tin cups with paper cupcake liners.

Cupcakes
Sift the cake flour, baking powder, and salt into a medium bowl and set aside. In a large bowl and using an electric mixer on medium speed, beat the butter and sugar until smoothly blended and lightened in color, about 2 minutes. Add the eggs one at a time, mixing until each is blended into the batter and it looks creamy. Add the lemon juice, lemon zest, and vanilla and beat for 2 minutes. If the eggs are cold, the mixture may look slightly curdled. On low speed and in 3 additions (3 flour, 2 milk), add the flour mixture and milk alternately, beginning and ending with the flour mixture. Mix just until the flour is incorporated and the batter looks smooth.
Fill each paper liner with batter. Bake just until the tops feel firm and a toothpick inserted in the center comes out clean, about 23 minutes. Cool on a wire rack.

Frosting
In a large bowl, using an electric mixer on low speed, beat the butter, cream cheese, grated lemon peel, and vanilla until smooth and thoroughly blended. Add the powdered sugar, mixing until smooth, then beat on medium speed for 1 minute to lighten the frosting further. Use a small spatula to spread about 3 tablespoons of frosting over the top of each cupcake.

Glazed Lemon Peel (optional)
Using a vegetable peeler and a slight sawing motion, remove the lemon rind from the lemon in large strips. Trim off any white pith that remains on the rind and cut the rind into matchstick- size strips. Put the strips in a small saucepan, cover with water, and bring to a boil. Strain, then rinse the lemon strips with cold water. Heat the water, sugar, and vinegar in the saucepan over medium heat and bring to a simmer, stirring to dissolve the sugar. Add the lemon strips. Simmer for 10 minutes. Use a slotted spoon to remove the strips from the syrup to a small bowl. Cool thoroughly. Arrange several pieces of the glazed peel over the top of each cupcake.